2010/08/09

No.014 Poser Tutorial - Convenient Technique

method to apply IK partially, and symmetry function arm and leg.

apply IK partially
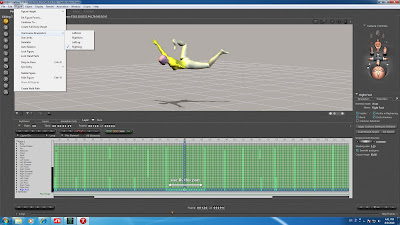
1, turn on IK, top menu [Figure]Use Inverse Kinematics->RightFoot
2, select Right Foot(frame) which want to apply IK.
3, push button Spline or Linear Section, make key to Right Foot.
4, repeat it to frame which want to apply IK.
5, turn off IK (Right Foot) and create key automatically to Thigh/Shin
6, if foot rotation is wrong, delete wrong key(Right Foot)
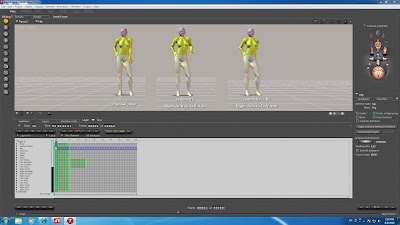
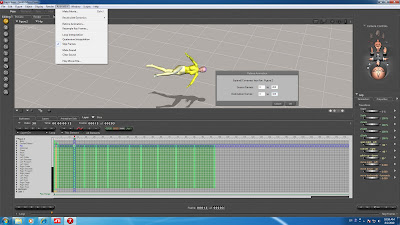
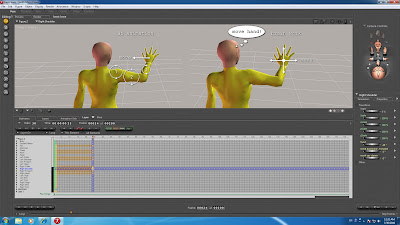
symmetry function can copy parameter right to left, left to right. arm, leg, body.. select frame which you want to apply. top menu [Figure] Symmetry. turn off IK, position is symmetric when turn on IK.

use IK + symmetry function, right hand to left hand. put waist same position.
1, create original pose to frame-2 and turn on IK (Right Hand)
2, select frame-20, edit Abdomen & Chest rotation-XYZ value change to zero.
3, turn off IK (Right Hand)
4, top menu [Figure] Symmetry->Right Arm to Left Arm
5, turn on IK (Left Hand)
6, work frame, delete key except Left Collar/Shoulder/Forearm/Hand.
7, move key frame(Left Arm) to frame-2.
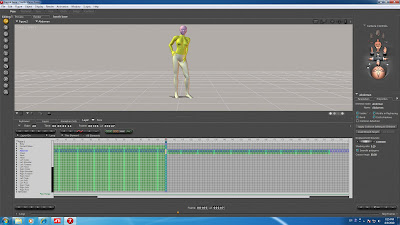
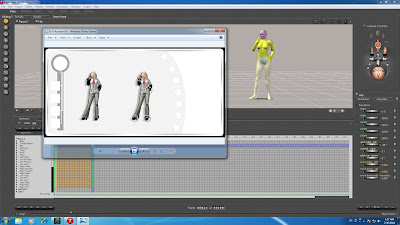
use IK + symmetry function, put hand to waist and apply it to all frames.

8, create any animation in 100 frames.
9, change total frames x 3, Frame : [0] of [300]
10, frame-105, make pose that put right hand to waist.
copy pose from other files and can paste it. (Ctrl+C), (Ctrl+V)
11, turn on IK (Right Hand)
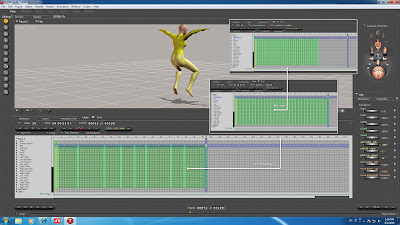
12, select range, Abdomen & Chest(frame-2 to 100)+(Ctrl+C)
13, select Abdomen & Chest in frame-105, and paste data (Ctrl+V)
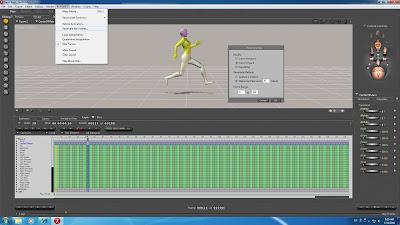
14, use resample, every [1] frames, Frame Range [105] to [203]
top menu [Animation] Resample Key Frames..
15, turn off IK (Right Hand)
16, select Right Collar/Shoulder/Forearm/Hand(frame-105 to 203)
17, drag selected range and move to frame-2 (frame-2 to 100)
18, delete work space after frame-100, Frame : [0] of [100]

2010/08/02

No.013 Poser Tutorial - Loop Animation

How to make loop animation and perfect loop.

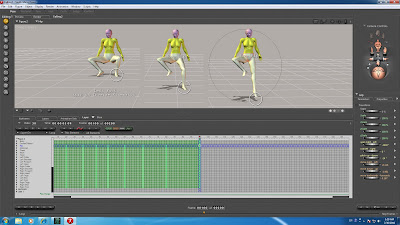
1, let make two poses and that change repeat.
2, make first pose in frame-2, select all joints + (Spline Section)
3, frame-2 copy & paste to frame-3 (Ctrl+C, Ctrl+V)
4, frame-2 select all joints + (Linear Section)
5, make second pose in frame-20, select all joints + (Linear Section)
6, frame-50 select all joints + (Spline Section), and make key frame.
7, frame-3 copy & paste to frame-70 and 90, same frames.
8, frame-70 select all joints + (Linear Section)
9, change fps and total frames, Rate [3], Frame: [0] of [90]

export BVH this and upload to secondlife. checked Loop, LoopIn 0%, LoopOut 100%, EaseIn/EaseOut 0.5sec, others are default. start animation.. EaseIn 0.5sec change(start) animation is smooth. changing pose, first pose to next pose. when came to frame-20, you see second pose and that posing to frame-50. changing first pose frame-50 to frame-70 and posing to frame-90.. go to frame-2 and repeat animation. Linear Section, animation stops tight.

Make perfect loop processing before export BVH.

don't overwrite file, because original key frame is lost with this process.
1, increase total frames 90 to 300(x3), Frame : [0] of [300]
2, copy frame, frame-3 to 90 select all joints (Ctrl+C)
3, frame-90 select all joints and paste data (Ctrl+V)
4, data pasted frame-90 to 178, select frame-178 and paste data (Ctrl+V)
5, loop animation made in frame-90 to 178, use resample and build key frame.

top menu [Animation] Resample Key Frames, open dialog
(1) Make key frame every [1] frames
(2) Frame Range : [90] to [178] and click button [OK]

7, select all joints in frame-90 to 178, click button (Linear Section)
8, drag selected range (frame-90 to 178) and move to frame-2
9, change total frame, Frame: [0] of [89] and export BVH.
10, upload window, checked Loop, LoopIn 1.75/89x100% = 1.966%, upload.

copy range repeating, arrange three ranges. perfect subframe is made in middle range. make key frame and fix range, not need frame-2 and move range there. remove one frame.. when make loop animation, add one frame to total frame. this repetition has two same frames, first frame is same as last frame. that animation stops for instant. remove that part with LoopIn, 1.75(skip)/n(total frame)x100%=1.966%. if remove first frame or last frame, it's right way on poser. but animation structure fails on second life. two same frames which are not compressed create perfect loop.

2010/07/31

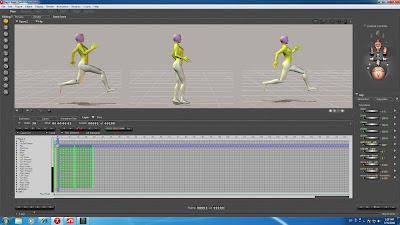
No.012 Poser Tutorial - Change FPS

Most suitable frame rate and explanation to compress frame.

- fps 10 to 14, irregular motion, dance and use motion capture.
- fps 08 to 12, smoothly motion, correct position and movement are not need.
- fps 03 to 06, stop hand or foot position precisely and move it.
- fps 01 to 02, posing animation and linear movement that changing.

frame rate means fps in BVH side. not graphics rendering fps, upload data in second life are time. high fps refers to time and creates frame, animation fps is same as screen fps. CPU make bone from BVH, and transforming avatar mesh. this means animation/skinning. hardware skinning transforms avatar mesh/vertex in GPU side. note-PC graphic processing is slow and when viewer dose not use hardware skinning, system may speed up. this is old item, turn on usually.

much movement animation is smooth when raise fps. but little movement has wobble. raise fps when make dance and irregular movement. there is a case more than limits(data size), when uploaded animation 12fps x 30seconds with irregular movement. you can change frame rate later. however, you should use some fixed fps to keep quality.

Compress frame with resample and retime function. refer to No.011, if there is much frames, animation is wobble. When you want to animation same as original BVH, compress frame before upload file. little wobbles when compressed frame, but roundness is lost.

if total frame is 200, change to 203, Frame: [0] of [203], top frame [Animation] Retime Animation, and move key frame. Source frames: [3] to [203], Destination frames: [3] to [103], if you make key frame to frame-150, frame space becomes half. change fps to half. animation palette, Frame : [half], original key frame is not lost, but key frame cant move to correct position. use this function if you don't want to move key frame one by one.

refer to No.010, rebuild key frame at equal distance with resample function. + compress frame with retime function.

No.011 Poser Tutorial - Bad Optimization

Second life, optimize BVH file to precomputed data with asset server.

1, precomputed data size less than 60Kbyte.
2, optimization is joint unit, and original file is lost.
3, convert BVH frame to time. create key frame from BVH.

if total frame 360 and 12fps, animation is 30 seconds. if total frame 300 and 10fps, animation is 30 seconds. get smooth if increase total frames, but second life animation optimize it. same animation and eaven if different fps, converted same data on secondlife.

- when increase total frames, movement every frame becomes small.
- frame that movement is slight, that part optimize.
- many frames and slight move, compressibility rises.
- little frames and greatly move, compressibility deteriorates.
- even if different total frame, uploaded data is most same size.

4, first(mean Frame-2) and end frame not optimized. loop is possible.
loop from middle frame is not done, because original frame is lost.
6, if there are many frames, exact movement is shaky.

optimization processing is bad. hand and foot position is joint rotation to connect with it. this is important and lost in optimization. synchronization is lost so that there are many frames.

No.010 Poser Tutorial - Resample Animation

Simple resampling function can rebuild key frame. computed frame which near to key frame is unnatural, and get smooth if use this function. you should try this before exporting BVH file. original key frame is lost, you don't overwrite working file that applied this function.

top menu [Animation] Resample Key Frames, open dialog
(1) Make key frame every [4] frames
(2) Frame Range : [3] to [end frame] and click button [OK]

(1), smooth so that value is high. (2), frame range to apply. this function has bug, not refresh animation palette. refresh it, select frame-1 all joints and push button (Spline Section).

2010/07/30

No.009 Poser Tutorial - Make Animation

Animation is sequence a lot of poses, important that make good pose.

1, Frame-1 first frame is removed in second life. but count as total.
2, Frame-1 means zero. BVH dose not have problem even if edit this.
3, if all frames are same as first frame, that joint data remove.
4, data are removed even if make key frame on poser. check zero with first frame.
5, cant remove data partially, even if make frame same as first frame.
6, when joint data are removed, other animation are applied to joint.

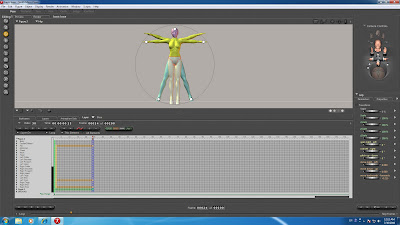
Edit T-pose that made to frame-2 and make first pose.

7, if editing frame is completed, make perfect key.
select Hip to RightFoot + push button (Spline Section)
8, copy frame-2 to frame-3, select joints Hip to RightFoot (Ctrl+C), (Ctrl+V)
9, select joints in frame-2 and click button (Linear Section)

Frame-1 does not edit, Frame-2 is same as frame-3, frame-2(Linear), frame-3(Spline). make next pose to after frame-3.

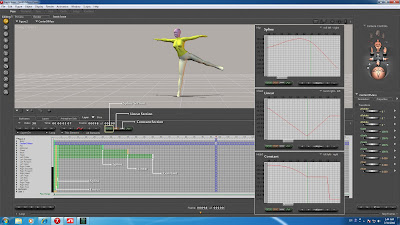
you can move key frame later, make key with equal distance is good. there is computed frame between key frames. when edit joint and make key, key frame become spline section. can make animation such as Hummingbird when use Constant Section. when want to stop movement suddenly, use Linear Section. curved Spline Section. you should know how to make hand position. when you edit only one joint and cut corners, animation between key frame becomes unnatural.

2010/07/29

No.008 Poser Tutorial - Make Pose

How to make posing animation and use IK(Inverse Kinematics). head and both hand, both foot, distance that can move does not increase from Hip. you think about five points and make human posing.

3D software, rotation shoulder-arm and move hand position. when you move hand in real life, your brain move only hand position. don't think about rotation arm. therefore, QAvimator(free soft for animation) work is difficult.. and pose has it.

Make pose same as this avatar.

1, edit each joint with parameter dial.
2, edit Hip first. because, Hand and Foot position move when edit Hip.
3, edit Abdomen, edit Chest.
4, edit Collar-Shoulder-Forearm and move Hand position.
5, edit Thigh-Shin and move Foot position. not need to perfect.

Hand and Foot position are important. joint rotation has limit, when use limit function, top menu [Figure] Use Limits. move joints is easy to understand, but human joints stretch and contract.. cant make perfect pose with only rotation. if you understand limit, turn off (Use Limits).

6, when foot is float from ground, take down Hip position. (Ctrl+D)
7, Left Hand turn on IK, top menu [Figure] Use Inverse Kinematics
8, tuen on IK and select Left Hand, add position to parameter dials.
9, Hand position can move XYZ-axis. move to correct position.
10, turn on IK, Right Hand/Left Foot/Right Foot, and same editing.

IK edites joint to connect with Hand automatically, if move only Hand position. however, it is not correct. expensive 3D software has better IK..

when you want to foot adhere to ground, turn on IK and parameter dials yTran/xRotate/zRotate value change to Zero. foot distance is not enough, take down position with Hip and keep distance.

when apply joint limit to pose, top menu [Figure] Use Limit, revised automatically. cant back value (Ctrl+Z) changed by this function. you can confirm where is bad when turn on all IK + turn on Use Limit. restore, close file without saving and open same file again.